Preparing for Amaryllis Planting
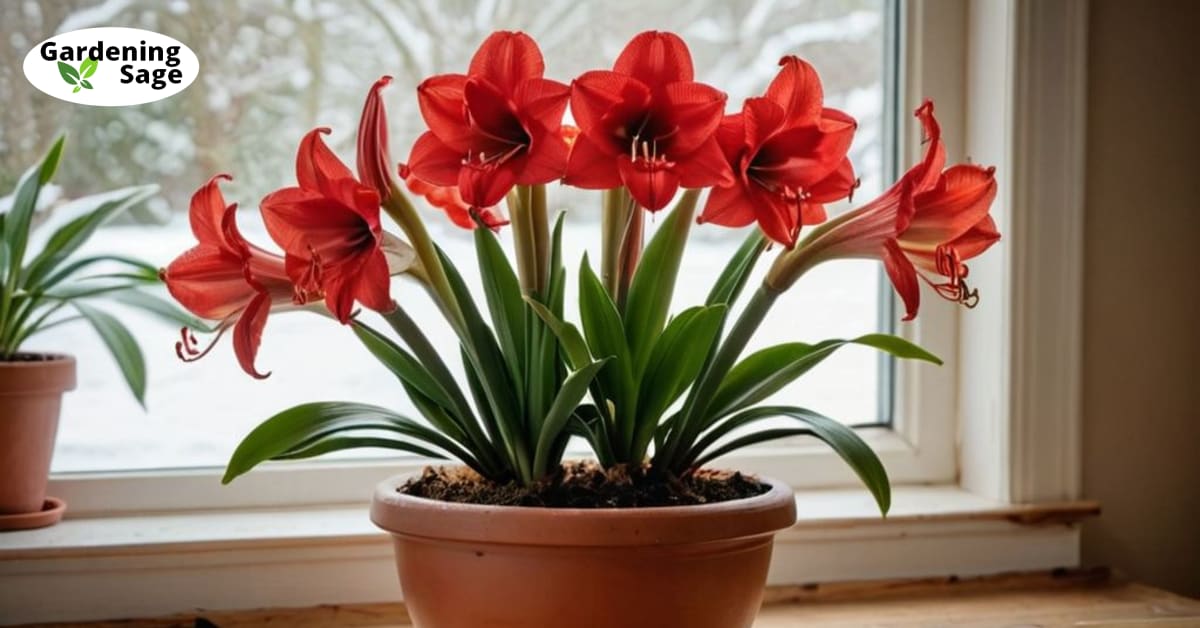
As the crisp air of fall gives way to the chill of winter, the amaryllis bulb emerges as a delightful beacon of warmth, offering a way to brighten up your home and garden with its gorgeous, trumpet-shaped blooms. These flowers are not only stunning but also serve as a reminder that beauty can thrive even during the colder months. Before you can bask in the joy of their vibrant flowers, it is crucial to understand that proper planting and care are essential. When you grasp the nuances of how to successfully plant amaryllis bulbs, you’ll be rewarded with weeks of color and beauty, bringing a sense of pride and accomplishment to any gardener or plant enthusiast.
Picking the Ideal Bulb
Embarking on the journey of growing amaryllis begins with selecting the ideal bulb. Look for large, firm amaryllis bulbs that feel heavy for their size, a sign of a healthy, robust plant waiting to emerge. It is important to avoid bulbs that are mushy, moldy, or otherwise damaged, as these are indicators of poor health and may result in subpar blooms or even failure to grow. Select bulbs that are about 2-3 inches in diameter for the best growth and flowering. A bulb of this size has ample energy stored to produce a stunning display of flowers.
Choosing the Right Pot
Choosing the right pot is just as important as selecting the bulb itself. Pick a pot that is just slightly wider than the diameter of the bulb, with drainage holes in the bottom to prevent water from pooling and potentially causing rot. Terra cotta, ceramic, and plastic pots all work well, offering a range of aesthetic choices to match any decor. To further ensure proper drainage and prevent root rot, place a layer of gravel or pebbles in the bottom of the pot. This will allow for excess water to drain away from the bulb, keeping it in the ideal condition for growth.
Planting Steps for Amaryllis Bulbs
Once you’ve chosen your amaryllis bulbs and pots, you are ready to begin the planting process. Follow these simple yet effective planting steps to ensure the best start for your bulbs:
- Fill the pot about 1/3 full with a well-draining potting mix. A high-quality potting mix is recommended, although garden soil can also work well if it is loose and fertile.
- Plant the amaryllis bulb in the pot, with about 1/3 of the bulb above the soil line. This positioning allows for the right balance of support and exposure to air, which is critical for the health of the bulb.
- Surround the bulb with more potting mix, gently packing it in place, and leaving just the very top of the bulb exposed. This will provide stability for the bulb as it grows while allowing it to breathe.
- Water the bulb thoroughly until water drains from the bottom of the pot. This initial watering is crucial to settle the soil and provide the necessary moisture for the bulb to begin its growth process.
- Place the pot in a sunny, indoor location where the temperature is consistently around 70°F. Amaryllis bulbs thrive in warm conditions with plenty of light, which encourages the stems to grow strong and the blooms to be vibrant.
Caring for Your Amaryllis
Amaryllis plants are relatively low maintenance, but they do require consistent attention to moisture levels. Check the soil daily and water the plant when the top inch becomes dry to the touch. Overwatering can be detrimental, so it is important to ensure the soil is moist but not waterlogged. Applying a balanced liquid fertilizer every 2-3 weeks will also encourage the development of strong, healthy flowers. This regular feeding provides the necessary nutrients for the plant to produce the energy required for blooming.
Enjoying Amaryllis Flowers
With proper care and attention, you can expect dramatic and stunning blooms approximately 6-8 weeks after planting. Each bulb is capable of producing multiple stems, each covered in an impressive display of 4-6 large, trumpet-shaped flowers. These blooms are not only a feast for the eyes but also have a subtle, delightful fragrance that can fill a room. The blooms typically last 2-3 weeks, providing a long-lasting display of color and beauty. To encourage the plant to rebloom, it is important to remove faded flowers promptly. This prevents the plant from expending energy on seed production and instead directs it towards new growth.
After the flowering period has concluded, it is essential to cut back the stems to just above the bulb and allow the leaves to grow. These leaves are the plant’s powerhouse, soaking up sunshine all spring and summer, and converting it into energy that is stored in the bulb for the next year’s flowers. It is important not to remove the leaves until they naturally yellow and wither, as premature removal can weaken the bulb. As the growing season ends and fall approaches, reduce watering to allow the leaves to die back naturally. Store the potted bulb in a cool, dark place for a dormancy period of 6-10 weeks. This rest period is crucial for the plant to reset and prepare for the next growing cycle. After this dormancy, you can restart the planting process and look forward to enjoying the magnificent amaryllis flowers again next winter, continuing the cycle of growth and beauty.


